

If you have ever heard of or used Linux distributions, you will find that this operating system is the ideal environment for programming, right?
And because Microsoft knows how great the demand for Linux is among developers, they have provided a feature exclusive to Windows 10, which is Windows Subsystem for Linux.
This article will help you install WSL extremely quickly and easily without having to manually download any executable files.
What is WSL?
Before we begin the installation, we need to understand what WSL really is!
Windows Subsystem for Linux (abbreviated as WSL) is a Linux operating system (one or more distributions) that runs within the Windows 10 operating system, designed to help developers run command lines specific to GNU/Linux.
It includes most command lines, utilities, and software designed specifically for Linux that can run directly on Windows 10 without needing to use a virtual machine or dual boot.
Currently, Microsoft has upgraded WSL to version 2, which is expected to be newer and faster than the old version. This version 2 can be upgraded on Windows 10 2004.
Features
As I mentioned above, WSL allows us to execute commands that are specific to Linux. Its features include:
- Running commands like grep, sed, awk,…
- Running bash scripts for terminal and software using GNU/Linux commands such as:
- Tools: vim, emacs, tmux
- Languages: NodeJS, Javascript, Python, Ruby, C/C++, C# & F#, Rust, Go, etc.
- Services: SSHD, MySQL, Apache, lighttpd, MongoDB, PostgreSQL.
- Installing software using package managers like APT.
- Calling Windows applications directly from the Terminal.
- Calling GNU/Linux applications directly on Windows.
Who is WSL suitable for?
- Regular users who are not very familiar with Linux but want to get acquainted with command line
- Students who need to use Terminal but don’t want to install Linux distributions
- Developers who want to optimize their workflow, skipping the switch between Windows and Linux and vice versa
- Users who want to save time, wanting to use both Windows and Linux on the same machine without dual booting.
How to install WSL
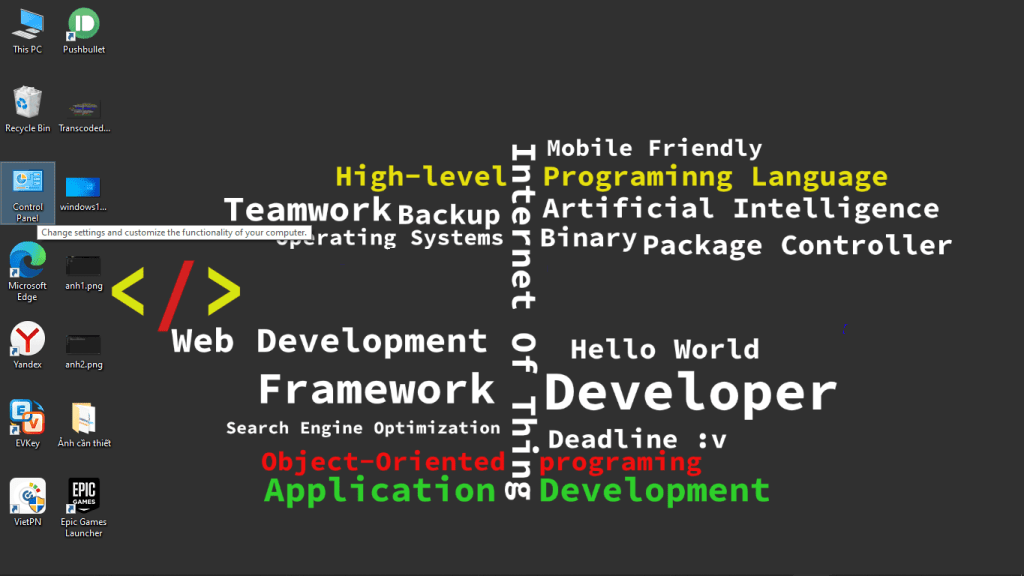
Installing WSL is extremely simple. First, open Control Panel on your desktop or in the Windows 10 search bar.
Note: Although there are many ways to install WSL, I will only guide you through the method in this article because it is easy to follow and not too complicated.

Next, select Programs and Features (if you don’t see it, search for it in the search bar)
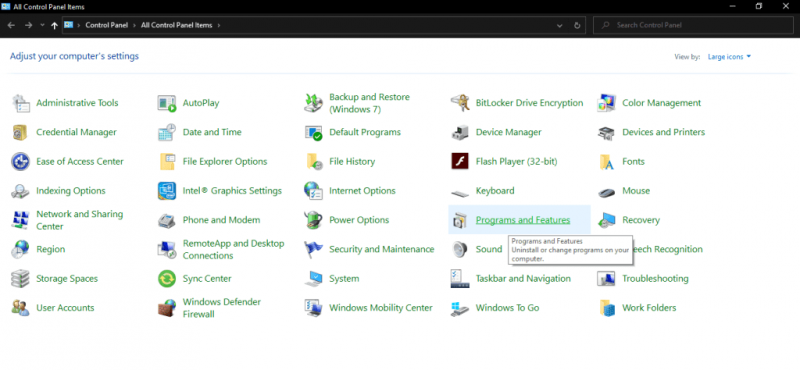
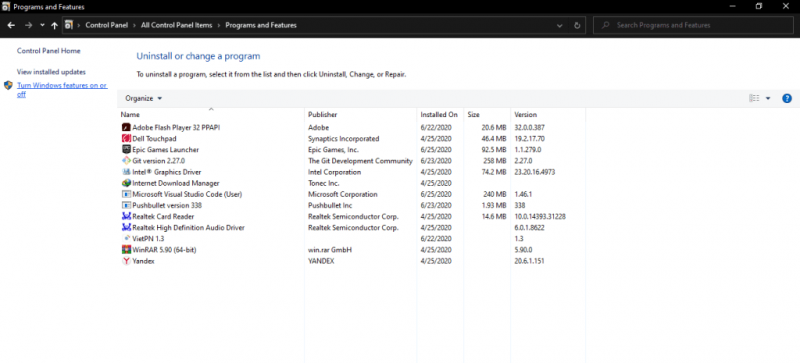
Then select Turn Windows Features on or off
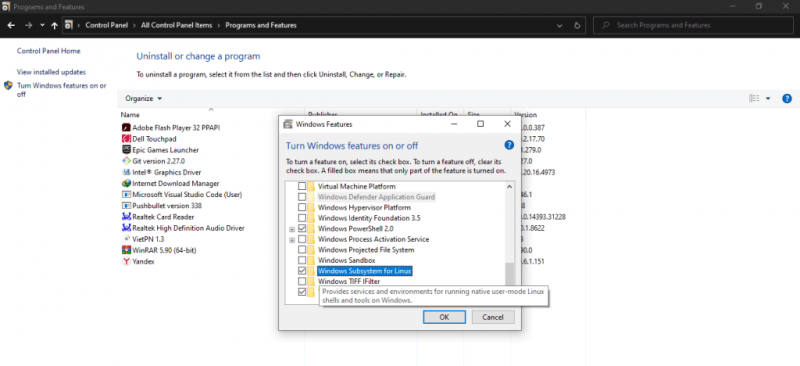
Here, scroll down until you see Windows Subsystem for Linux, check the box, and click OK
Wait for the installation process to complete…
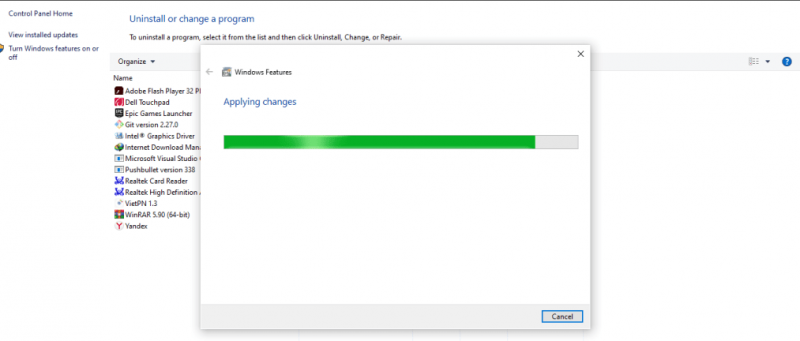
After the installation is complete, click Restart now to restart your computer (required)
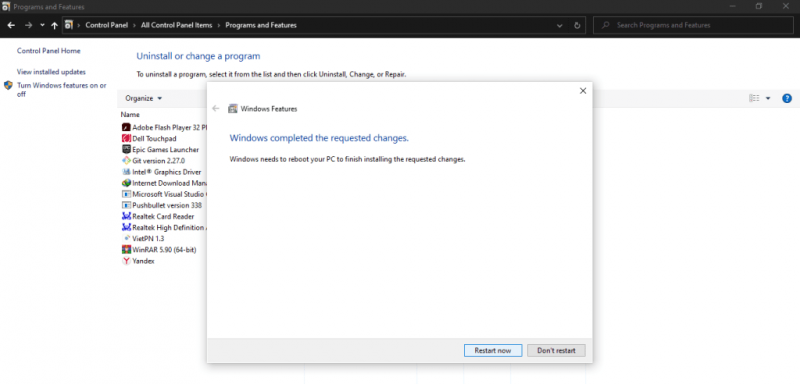
After restarting your computer, open Microsoft Store

Then in the search section (Search), search for wsl and press Enter, and you will see a list of distributions that Windows supports.
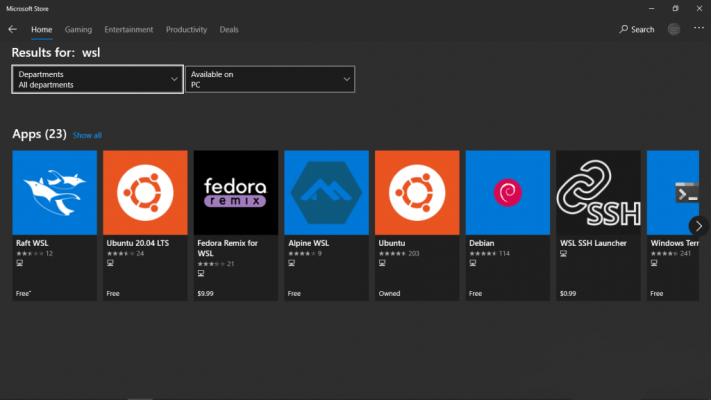
You can choose one or more distributions. For example, if you choose any distribution, you need to click Get and wait a moment…
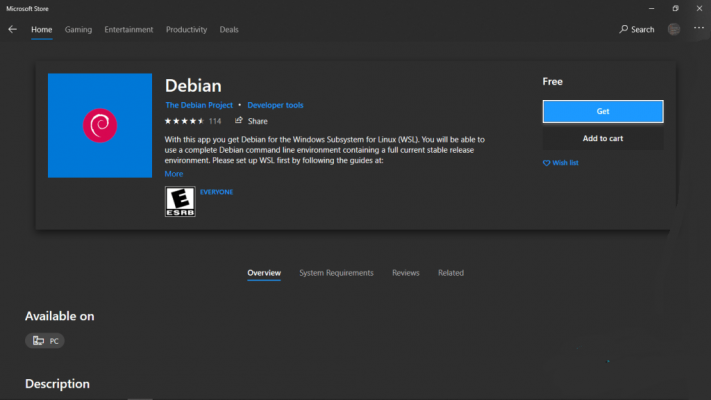
Since I will be installing the Ubuntu distribution, I will switch to the Ubuntu section (if you want to install Ubuntu, choose this one, don’t choose the individual versions to avoid errors).
Then click Install or the download icon.
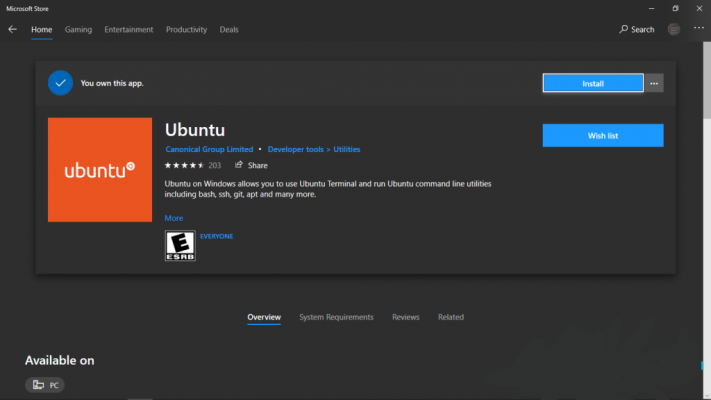
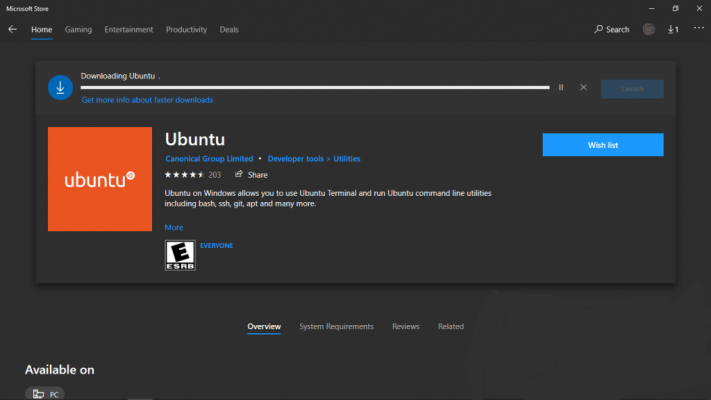
Wait for the download and installation process to complete.
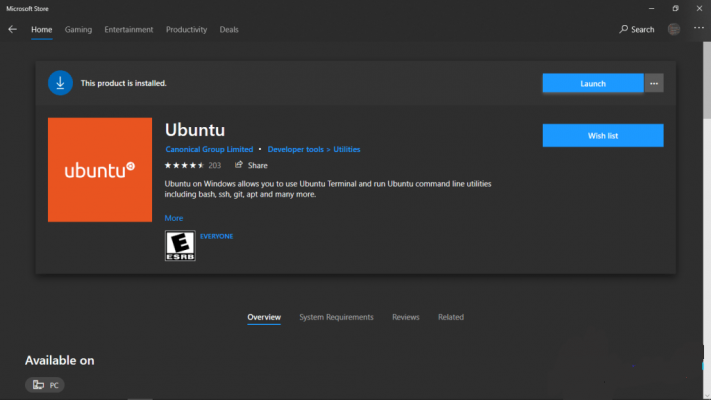
After the installation is complete, you can open it by clicking the Launch button to open the Terminal.
It will switch to the Terminal window, wait for it to load…
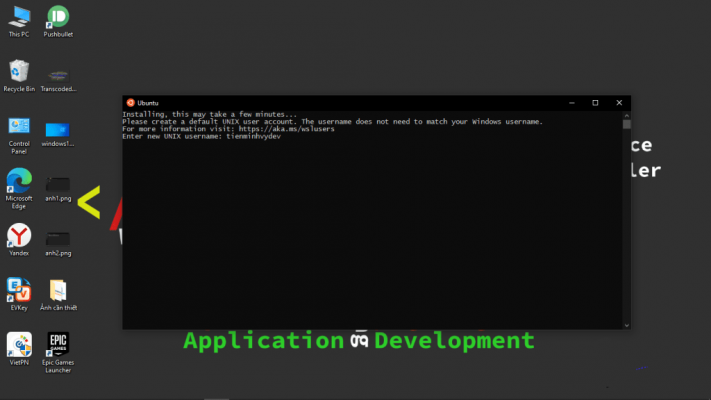
Then, it will ask you to enter a username. You can enter any username you like.
Then enter your password. Note that the password you type from the keyboard will not be displayed on the Terminal for security reasons.
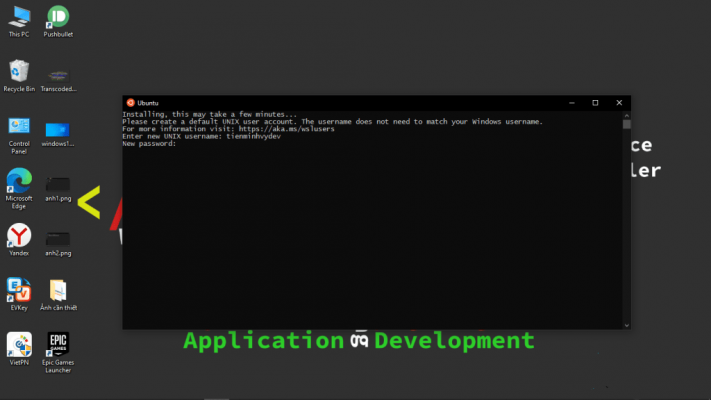
Then re-enter the password you just entered.
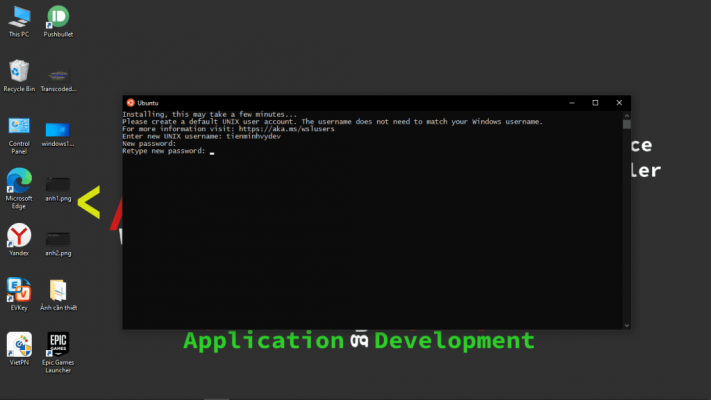
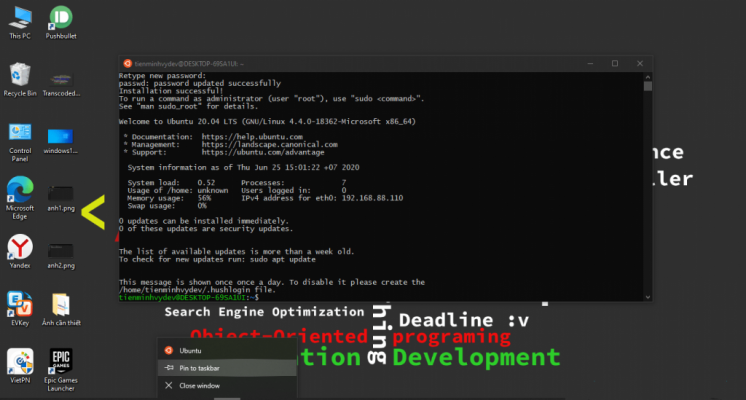
And finally, the installation process is complete!!
Quick tip
If you want to open the Terminal window in any folder on drives C:, D:, E:, F:, etc., go to that folder, press SHIFT + right-click simultaneously, and click on Open Linux shell here.
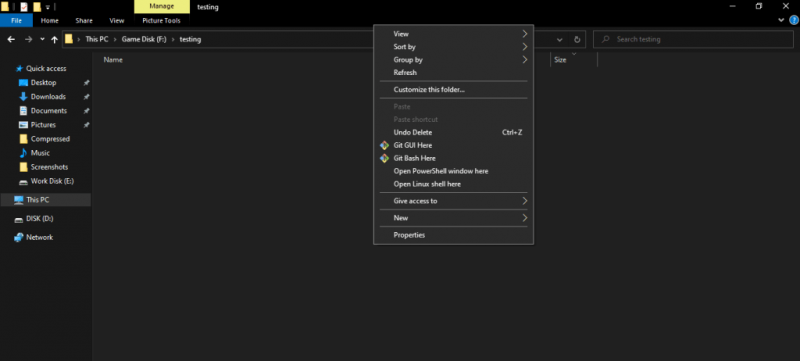
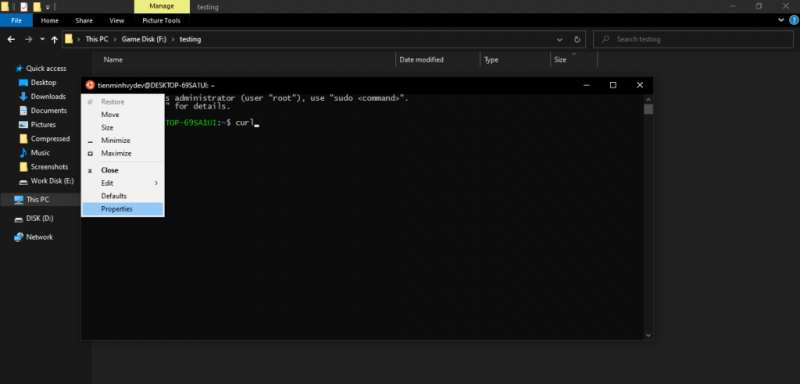
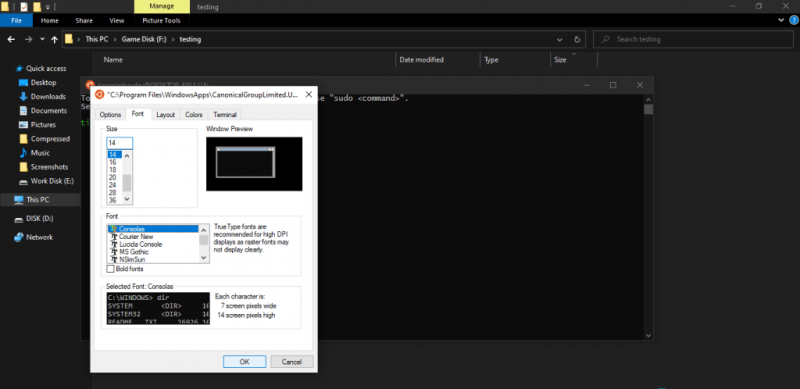
Additionally, since this Terminal uses a font that doesn’t support Vietnamese, sometimes when you type Vietnamese it shows annoying square boxes. To fix this, do the following:
First, click on the Ubuntu icon in the top left corner of the Terminal, then select Properties.
Then, select the Consolas font and you’re done.
Upgrading WSL from version 1 to 2
To upgrade WSL version, you need:
- Windows 10 OS, version 2004, Build 19041 or higher
- Check by pressing Win + R, typing winver and pressing OK. If it’s not Build 19041, you need to update Windows to the latest version.
If your computer meets the requirements, follow these steps:
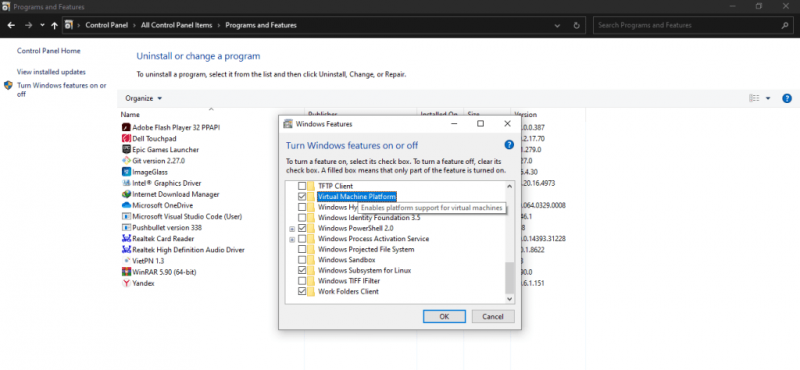
Enable the Virtual Machine Platform option in Control Panel
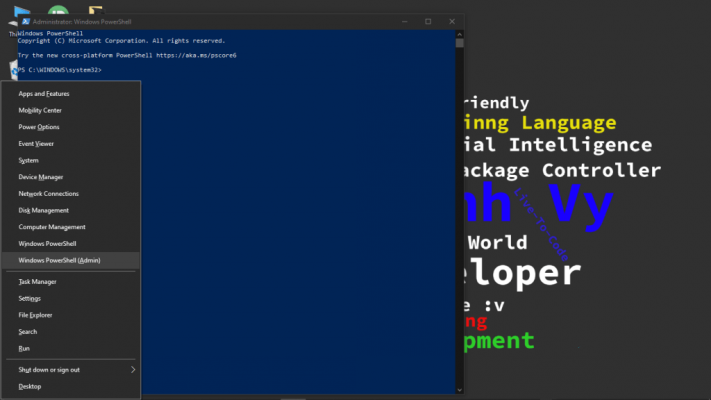
Then, restart your computer and enter the command wsl --set-default <distro-name> 2 in Powershell (Open Powershell by pressing Win + X and clicking on Windows Powershell (Admin)
Then, you may receive the following response:
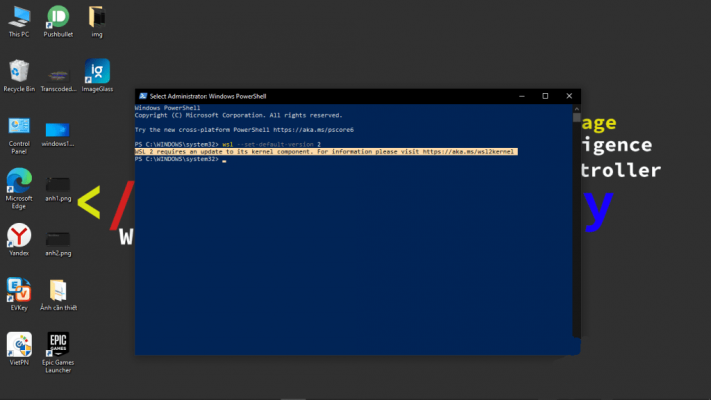
If you receive the above response, click on the following link to download and install the supplementary software:
https://wslstorestorage.blob.core.windows.net/wslblob/wsl_update_x64.msi
The installation is simply clicking Next and Finish…
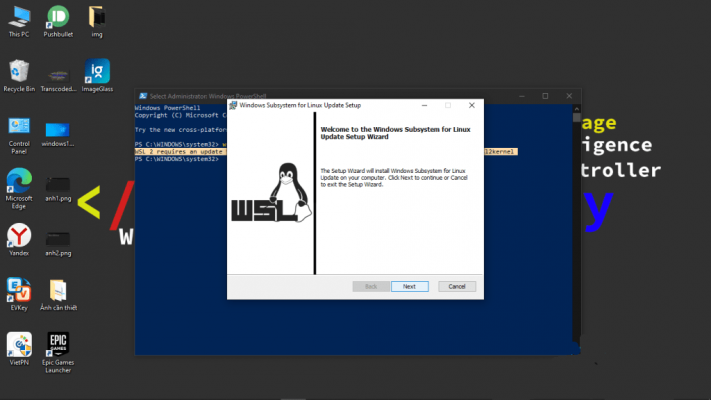
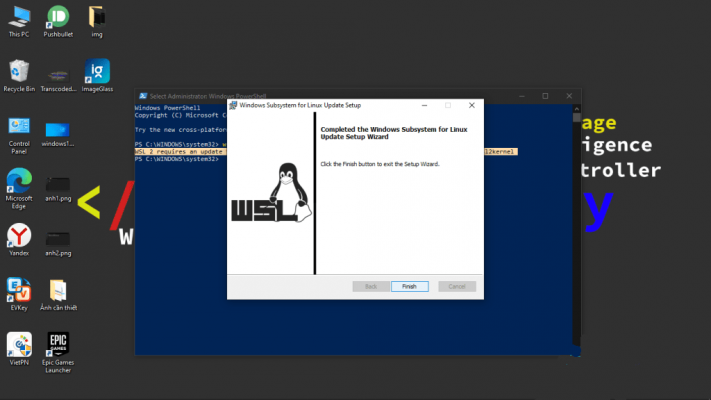
After the installation is complete, re-enter the above command and press Enter, it will display the following:
Conversion in progress, this may take a few minutes...
For information on key differences with WSL 2 please visit HTTPS://AKA.MS/WSL2
Wait about 5 minutes, if it doesn’t close automatically, close it manually. Then reopen Powershell and enter wsl -l -v if it shows like this:
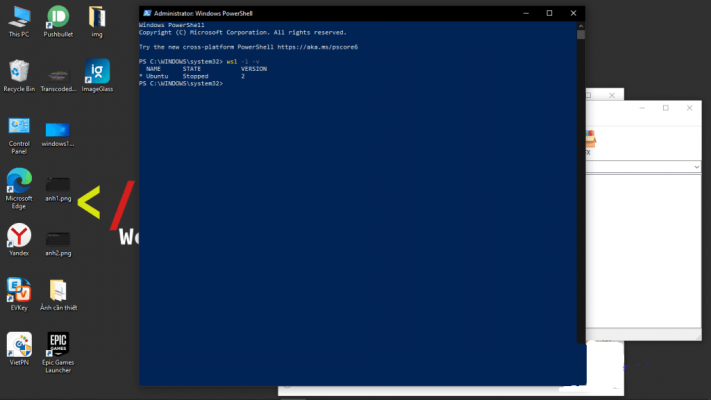
Congratulations, you have completed the upgrade!!
Conclusion
Through this article, I have provided you with a very detailed guide on how to install WSL along with some useful tips. If you like it, don’t forget to share the article, and remember to leave a comment if you have suggestions or encounter any difficulties below!
s:tienminhvy